How To Remove and Install PWC Traction Mats
Improve your craft's look and performance
Of all the things that can make your PWC look old or worn (not to mention dangerous to ride), decayed or peeling traction mats just may be the most common…as well as the easiest to fix. The toughest part is getting the old mat material, and its glue, off the surface of your craft. After that, it’s simply a matter of attaching the new ones.
New traction mats will not only ensure your solid footing, or ward off that untimely bump or cruise, they’ll also offer you the opportunity to upgrade or change the look of your PWC. Tired of that boring black? Choose a color that corresponds with the hull. Want to really express yourself? Go wild with patterns or grip surfaces. There are plenty of choices available, including mats from industry favorites HydroTurf, BlackTip, and Jet Trim. Find the style and color you want, slap them on your craft, and it will be better than new.
At least in the mat department. We can’t speak for the rest of your craft…
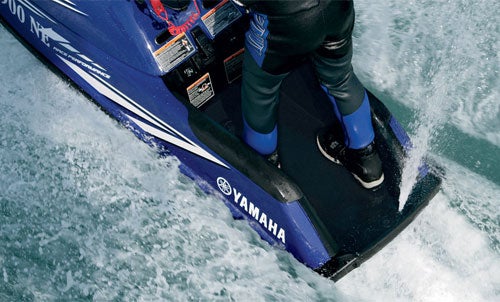 Traction mats eventually start to show signs of abuse and decay. Changing them is an easy way to improve the look and performance of your PWC.
Removal of Existing Mats
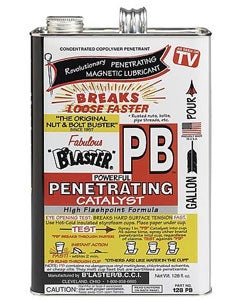
We won’t kid you – removal of the existing mats is often the worst part of the job. You may get lucky and have them (or what’s left of them) peel right off. Chances are, however, you’ll end up doing some work.
There’s no simple way to get the job done. In our experience the best method is to simply put on the rubber gloves, get a putty knife or plastic scraper and some type of chemical adhesive remover, make sure your work space is well ventilated, and then get to work.
Start at an edge, applying the adhesive remover and give it a little time to work its magic, and then start scraping. Lift or pull gently at the mat as you go for best results. Don’t be too concerned if you actually scrape the painted surface of the fiberglass or SMC underneath the mats; you’ll want to roughen this up anyway for better adhesion of the new mats.
Ideally, don’t stop until you’ve removed all traces of the old mats and glue. Sorry…that’s just the way it is. Aftermarket mats made of sheets of EVA foam typically come up the easiest. If you’ve got the old-school, rubbery mats like those found on an old Kawasaki stand-up, you have our condolences.
Prep the Surface
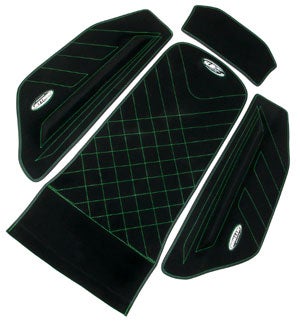 Before installing your new traction mats, prep the surface by giving it a good sanding.
While it’s certainly possible to just glue or adhere the mats to the clean, shiny surface of your deck, you’ll get better results if you lightly scuff up the surface to promote better adhesion. Grab some sandpaper (try in the neighborhood of 80 grit) and gently scuff up the surface to remove the gloss. If you’re worried about damaging the paint outside the area the mats will cover, tape the outline of the mats off first with masking tape.
Don’t get crazy with the sanding. All you’re trying to do is roughen the surface to give the adhesive a better grip. When you’re done you’ll have created a fine layer of dust, so wipe things down one last time with acetone or adhesive remover to ensure a clean, particle-free surface.
Install New Mats
Depending on which brand and type of mat you choose, you’ll either get a style with a peel-and-stick, pressure-sensitive adhesive or bare mat material that requires some type of contact cement. If it’s the latter, make sure the product is water-resistant. Most manufacturers sell their own cement that is to be applied with a cheap paintbrush. We’ve also had good success with 3M’s hi-Strength 90 spray adhesive. The latter is a little pricey, but certainly a lot more easy to work with.
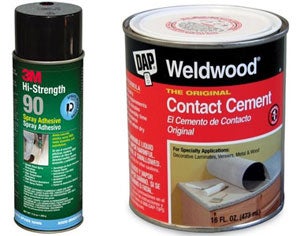 Apply adhesive to the mat and your PWC and prepare yourself for the big install.
Any type of contact adhesive requires you coat both sides to be adhered, meaning you’ll need to coat the bottom of the traction mat as well as the area on the deck to which it will be adhered. Again, if you’re fussy, tape the area off to avoid glue getting beyond the confines of the mat. Glue or adhesive needs to be applied, and then allowed time to get “tacky” before the two surfaces are brought together. Follow the manufacturer’s directions to get the timing right.
Now comes the tricky part. Contact-style cements stick, you guessed it, on contact. That means if you touch the parts together before you have them perfectly lined up you’ll be pretty unhappy with the results. This is the time to have the helping hands of a friend. Carefully line everything up, and then carefully set the mats into place, applying plenty of even pressure over the entire surface area to make certain the mats are adhered. Use a roller, the palm of your hand, or even a book to evenly distribute pressure across the entire surface. Then follow the glue manufacturer’s curing time to allow everything to set up and ensure the bond is as strong as possible.
It is possible to clean up excess glue on the PWC’s deck that may have gotten placed outside the confines of the mat. Use adhesive remover, but be careful. You don’t want to work too much around the edges that you have just so carefully adhered. A loose edge is a guaranteed way to have the new mats start to peel or tear – just like the old ones.
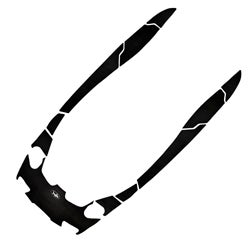
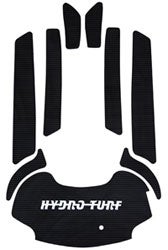
Treat ‘em Right
Now that things are looking good again, and your feet are staying where they belong, treat your new mats with a little kindness. They’re durable, but avoid getting any unnecessary sand or rocks in the footwell area. They’ll just grind away at the EVA foam. Another good idea is to avoid unnecessary UV exposure, especially if you’ve chosen a bright color. Today’s mats are pretty durable, but left exposed for long periods, they’ll ultimately fade and dry out from the sun.
Which just may be why you installed new mats in the first place…
Related Reading
Freshen up Your Craft’s Look before Summer
Five Ways to Beat Saltwater Corrosion
Upgrading a PWC Trailer to LED Lighting
How To Properly Store Your PWC Fuel for Winter
How To Find Good Service For Your PWC
How To Choose a PWC Boat Cover
Get PersonalWatercraft.com in your Inbox!
Like PersonalWatercraft.com on Facebook
Comments
Most Popular

2025 Yamaha JetBlaster PRO 2-Up Review
2024 Kawasaki Jet Ski STX 160X Review
Remembering the Sea-Doo XP

Whatever Happened to the Wetbike?

2025 Yamaha JetBlaster Review





 Your Privacy Choices