Six Commonly Overlooked Winterizing Tips for PWC
Be ready to ride in the spring
Ready for winter? Whether you had a dealer prepare your craft, or handled the job yourself, make sure you didn’t miss these commonly overlooked winter-prep tips…
Scrub-a-Dub-Dub
Put your PWC in the tub. Sorry, had to go for the lame rhyme there, but the message is clear: Don’t put your craft away dirty. A wash will get rid of everything from salt residue to organic material to all that gunk that hides in your craft’s corners and crevices. Leave it and it will lead to things like rust, corrosion, mold and mildew. Get rid of it and you’ll have a sparkling craft ready to hit the water come spring.
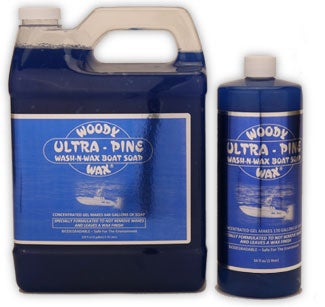
On the hull’s exterior, avoid dishwashing liquid. It strips wax. Use a good boat or car soap, and really suds things up before rinsing everything down with fresh water. Don’t overlook areas like the jet pump and engine compartment. In the latter, use a bilge cleaner (check your local marine supply) and let it have time to work before rinsing it away.
Air It Out
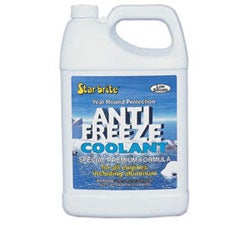
Once things are clean and soggy, it’s time to dry everything out. Start with the engine itself. Manufacturers differ in their suggested approach, but the key is to either empty all cooling passages of water (lest it freeze and crack something over the winter) or fill specific areas with antifreeze. Again, check your manual, or better yet let the dealer handle this prep. That way you’ve also got a warranty on the work should a problem arise.
If you’re handy and have the manual to check your steps, common winterizing procedures include changing the engine oil and filter, checking or replacing the coolant, and protecting your engine’s internal parts with a corrosion-blocking layer of oil or spray. Again, make certain you know exactly what you’re doing. The wrong steps could mean disaster come Spring. If you’re not up to the job, swallow your pride and get the dealer involved. Better safe than sorry.
Things you can do yourself include making sure everything is dry in the engine compartment before storage. Most water should exit through the drain plug; use a sponge to get out any remaining moisture, and follow up with a towel.
Towel or chamois dry the exterior of your craft, then follow up with a good coat of wax on all fiberglass parts, protective spray on plastic components, and a vinyl conditioner on the seat. With the latter, make sure it won’t leave things slippery, as that could lead to disaster on your next ride.
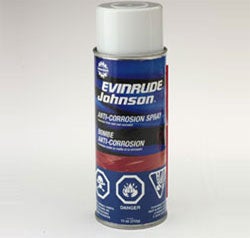
Metal components can also use a little layer of protection. Use a manufacturer-recommended anti-corrosion spray, or an aftermarket product like 656, to lightly coat the exterior of the engine, the internals of the pump and driveshaft, and any other exposed metal components.
When you’re ready to stow, don’t button things up tight if you don’t have to. Instead, block up the seat a couple inches to allow airflow. Again, the idea is to avoid that moist environment where things like rust and mold thrive.
Avoid Gas Pains
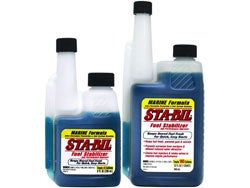
Ethanol-laced gasoline has made fuel storage more of an issue than it was in the past. Ethanol attracts water as well as acts like a solvent. Leaving some in your tank over the winter is asking for trouble. One solution is to completely drain your tank, but it’s not always the most practical suggestion. Instead, top off your tank (as well as any partially filled gas cans) with a full load of fuel, adding a fuel stabilizer to the mix. The full tank will head off condensation, while the stabilizer will maintain the integrity of the fuel itself.
Hint? Add the stabilizer just before your final winterization run of the engine, so that stabilized fuel will pump through the entire system.
Keep It Positive
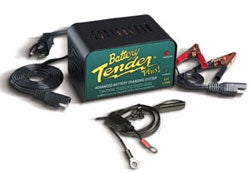
Batteries are another item that don’t do well through the winter. When you’re done with engine winterization, remove the battery and clean the posts with a solution of baking soda and water. A small wire brush can get things extra clean. Dry off the posts, and then coat them lightly to prevent corrosion. There are commercially available products made just for this purpose, but Vaseline also does the trick.
Remember, a fully charged battery resists deterioration better than a partially charged one. Put the battery on a battery charger, and then give it a little update charge once a month, or leave on a trickle charger to make sure it stays charged throughout the winter.
Keep Your Eyes Open
While you’re doing all these tasks, keep alert for problems that you should address now, rather than next spring when you’re anxiously trying to get back out on the water. These problems could include hull damage (dings, cracks, or chunks taken out from collisions or stress), torn seats, cut, cracked, or hardening rubber hoses, missing hose clamps, or excessive wear. If you find something, fix it now or make it your winter project. Don’t leave it till spring, as odds are it won’t get done.
Find A Good Home
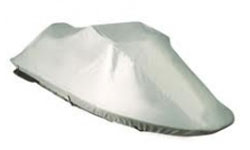
How you prepare your craft for winter is important, but so, too, is where you plan to store it for all those months. A secure garage is ideal. Cover the craft, tuck it out of the way, and rest assured that it will come through the winter in tip-top condition.
Sheds, barns and the like also work, but be wary of rodents. They tend to do things like make nests, leave lots of droppings, and maybe even chew up rubbery items like hoses, mats, grips, or seats. If you leave your craft in this environment, button things up a little tighter, and stuff a rag in air intakes, exhaust outlets, and other paths to your craft’s interior.
If you’re forced to stow the craft outside, make sure it’s covered and consider adding a secondary tarp as an additional layer of protection. Also make sure the craft is secured as best as possible to the trailer, and that the trailer itself is secured to a tree, beam, pillar, or sturdy fence. I’ve even seen people secure an eyebolt or screw to a concrete patio slab, driveway, or large, purposely poured anchor built into the ground. Add a hitch lock as well. Do anything and everything you can to make it difficult to take your craft and discourage thieves. Along those same lines, also remove any ID paperwork, as well as any accessories.
Remembered all of the above? Give yourself a pat on the back. You’ll be on the water in no time come spring.
Related Reading
How To Properly Store Your PWC Fuel for Winter
How To Prevent Personal Watercraft Theft
How To Find Good Service For Your PWC
Safe Boating Reminders For PWC Operators
Get PersonalWatercraft.com in your Inbox!
Like PersonalWatercraft.com on Facebook
Comments
Most Popular

2025 Yamaha JetBlaster PRO 2-Up Review
2024 Kawasaki Jet Ski STX 160X Review

Remembering the Sea-Doo XP
Whatever Happened to the Wetbike?

2025 Yamaha JetBlaster Review







 Your Privacy Choices