Upgrading a PWC Trailer to LED Lighting
Switch to LED for worry-free lighting
Trailer lights are a hassle. Sure they look nice and bright when everything is new, but eventually you’ll blow out a bulb or two, find a leak in the housing or just waste an entire weekend tracking down an elusive short or lost ground. Eventually, things will get so bad that you reach the breaking point. Those old lights, wiring and all, have got to go.
The good news is that the necessity of repairing or replacing your current trailer lighting also gives you the option to make things better. Yes, better. Until recently, your average trailer came with incandescent lights, which use bulbs for illumination. Incandescents, however, are not always the best match for the abuse of roads and launch ramps.
For starters, they have filaments, which can break due to vibration, and cases that can short and corrode. Add in the fact that they’ll regularly get dunked underwater, where a leaky housing can spell doom or cold water can cause a thermal shock to a hot bulb, and you’ve got a system prone to eventual failure.
Get the LED Out
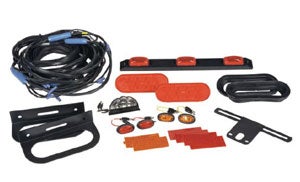 A top-end kit like Grote Industries’ Ultimate LED Trailer Light Kit is available for about $200 (West Marine).
The better choice today is completely sealed LEDs, or Light Emitting Diodes. Yes, they’re a bit more costly up front, but they’re far more worry-free in the long run. LEDs are rated at 100,000 hours of service, compared to an incandescent’s 3,000, have no filaments to break from vibration and are virtually immune to submersion thanks to their permanently sealed, welded polycarbonate cases. LEDs also are noticeably brighter, produce little heat (drastically lowering the risk of thermal shock), and draw less than 15 percent of the current required by incandescents.
“The extremely long life of LEDs makes them able to be sealed permanently into fixtures,” notes Chuck Hawley, Vice President of Product Information at West Marine, “which prevents water intrusion, and contributes to their long life. The reduced heat output also makes them less likely to pull water into their housings when immersed in water. Plus, reduced power consumption lowers the current flowing through the wiring harness, which reduces voltage drop, which keeps the LEDs operating at a uniform brightness.”
Obviously, choosing LEDs is a virtual no-brainer. Choosing which ones to buy, however, requires a little more thought. Naturally, you’ll want to choose lights that go with the look of your trailer. You’ll also, however, need to buy the appropriate sized kit.
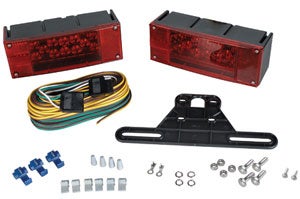 A less expensive solution is the Optronics LED Low-Profile Tail Light Kit, which retails for about $65 (Overton’s).
To be legal, trailers are broken down into two sizes—those less than 80 inches wide and those greater than 80 inches. Trailers less than 80 inches are required to feature taillights, turn signals, side marker lights and side and rear reflectors on each side. A license plate light is also a must; typically, it’s contained within the left taillight housing.
Trailers over 80 inches require a few more lights to define their perimeter, including a trio of red identification lights at the rear and clearance lights on the outer perimeter, typically the fenders.
Measure across the widest point of your trailer, including the fender wells. Then, buy the appropriate sized kit for your needs. It all sounds more difficult than it is. If you’re using a quality retailer like West Marine or Overton’s, just make sure you get the right size kit – all the necessary lights will be included.
Other items you’ll need? Depending upon what came with your kit, you might want to pick up a few butt connectors to connect your wires. Typically trailer wiring is 16-18 gauge, which takes a blue connector. Consider buying the heat-shrink style to ward off corrosion. You’ll also need a crimping tool to make your connections, as well as strip the insulation off your wire leads.
Getting the Job Done
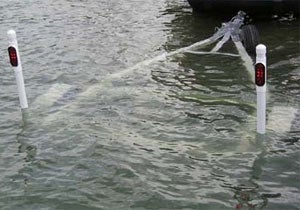 Ensure that all your connections are secure and sealed as your trailer is bound to spend some time in the water.
With a new light kit and various supplies in hand, take a moment to lay everything out along your trailer before removing the old lights, or cutting away the wiring harness. Make certain that the wiring is long enough to reach where it needs to go, and light posts match the existing mounting brackets on your trailer. Then, remove the old lights and get ready to get to work.
Do not, however, strip out the old wiring just yet, especially if you have an enclosed, tubular steel trailer which routes the wiring within for protection. In this case, clip the plug from the existing harness and then tie the appropriately color-coded wires to those in the new wiring loom. The dual brown wires handle your taillights.
In the normal wishbone wiring configuration, one will run down each side of the frame. The green wire is for the right turn indicator; obviously it will run down the right-hand side of the trailer. The yellow wire for the left turn indicator will run down the left side of the frame. White is your ground. It should be mounted to the trailer frame, typically in the same location as your former ground. If that’s under a bolt, pick up a ring connector and then crimp it on the end of the wire.
To avoid snags, use electrical tape to cover your knots. Next, just simply pull the old wiring out from the rear of the trailer, adjacent to the lights. The old wiring will act as a guide, pulling the new wiring into position and avoiding a lot of hassle. If your wires simply run along the outside of the trailer frame, make sure to secure them every 18 inches with heavy-duty wire ties or galvanized clips to prevent dragging or chafing.
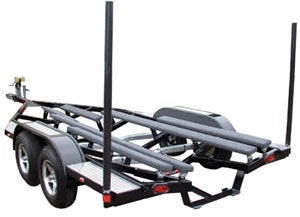 Once you install your LED light kit you’ll probably have to buy a new trailer before you have to update your lighting again.
With the new wiring in place, mount your LED lights onto the trailer’s brackets. Each light will have a white ground wire. It needs to be secured to the trailer frame in some fashion, typically where the old ground was located. Sometimes this can be a clip to the mounting bracket itself. You can also splice a ring connector onto the wire’s end and place it over the mounting bolts so that the ring is pinched between the metal bracket and the nut that secures the light in place. (Tip: Wire brush any corrosion off the bracket beforehand to assure a good ground.)
After that, it’s simply a matter of connecting the appropriate wire from the harness to the similarly colored wire at the light itself. “Use as few splices as possible in any trailer wiring harness,” continues Hawley. “Treat all splices as if they’re going to be subjected to saltwater, and use high quality adhesive-lined heat shrink butt connectors, and a hot air gun to insure a safe and waterproof seal between the splice and the wire jacket.” Hawley also suggests investing in a quality ratcheting crimp tool to insure that the correct amount of pressure is applied to each crimp.
Finally, coat the trailer and tow vehicle wiring connectors with a silicone grease or similar product to reduce corrosion and water intrusion. Protect trailer wiring harnesses from chafe by running the harness through rubber grommets where is passes through the frame of the trailer, and use sufficient clips or other attachments to reduce movement while on the road.
Light It Up
All that remains is to test everything out. Hook up the trailer to the hitch to ground the trailer to the car’s frame, and plug in your lights. Then, have a friend hop in the driver’s seat while you watch the lights at the back of the trailer. Make certain you have brake lights, running lights and both a right and left turn signal. Verify also that your license plate is illuminated and that any side perimeter lights, if required, are also lit when the car’s lights are on.
Then, get on the road and go somewhere. You’ve left your trailer light hassles behind.
Get PersonalWatercraft.com in your Inbox!
Like PersonalWatercraft.com on Facebook
Comments
Most Popular
2025 Yamaha JetBlaster PRO 2-Up Review

2024 Kawasaki Jet Ski STX 160X Review
Remembering the Sea-Doo XP
Whatever Happened to the Wetbike?

2025 Yamaha JetBlaster Review







 Your Privacy Choices